
Where Do I Even Start? Installing Claude Code from Scratch

Claude Code has been getting a lot of attention lately. If you are thinking about trying it but haven't gotten around to it yet, you are not alone – I was in the same boat until recently.
I had limited knowledge of what Claude Code actually is, so I didn't know when to use it or how to install it.
In this blog, I will share the differences between Claude products, basic knowledge of Claude Code, and how to install and set it up.
What Are the Claude Products?
Claude offers several products, each for a different use case.
Here are three of them.
Claude A text-based conversational AI assistant. You can use it for answering questions, writing, and analysis through a chat interface. Available on: Web, Mobile, Desktop
Claude Code An agentic coding tool for developers. It lets you delegate multi-step coding tasks to Claude, such as reading and writing code, refactoring, debugging, git operations, and running tests. Available on: Terminal, Desktop, Web, Visual Studio Code, JetBrains
Claude Cowork An agentic knowledge-work tool for non-developers. It lets you delegate multi-step work tasks to Claude, such as organizing files, creating documents, and doing research. Available on: Desktop
In short:
Claude: Conversational help with questions and tasks
Claude Code: Autonomous multi-step work involving coding, for developers
Claude Cowork: Autonomous multi-step work outside coding, for non-developers
All three products share the same account and the same usage limits. This means that if you use one of them heavily, you may hit the limit and be unable to use the others for a while.
For pricing details, see below:
Choosing How to Install Claude Code
As I mentioned earlier, there are several options for installing Claude Code.
It's up to you which one you use.
Terminal It's best to use it if you want to stay on the cutting edge because new features are released to the terminal first.
IDE This is a good fit if you want closer integration between Claude Code and your code editor.
Desktop This is great for letting Claude run in the background while you handle other tasks. It is also recommended for users who are not familiar with terminal or code editors, because you can install it like any other app.
Web If you want to remotely work on projects through a GitHub repository, this will be a solid option.
This time, I will install and set up Claude Code using the terminal on my Mac.
Installing Claude Code
Before installing Claude Code, make sure you have the following:
Prerequisites
Claude Pro, Max, Team, or Enterprise plan, or Claude Console account (the free Claude.ai plan isn't supported)
Working directory (a code project, or an empty directory for practice)
Installation
Create a working directory if you need one, then go to it. Note: The path below is an example.
mkdir /Users/username/Claude
cd /Users/username/Claude
Run the following command in the terminal.
curl -fsSL https://claude.ai/install.sh | bashOnce the installation is complete, run the following command.
claudeWhen Claude Code starts, the colour theme settings will appear. Choose the theme you prefer.

Next, choose how you want to log in to Claude Code.

There are three options. The first two are for individual use:
Claude account with subscription
This uses the same account as Claude on the web.
It is a fixed monthly charge with no additional fee, but there is a usage limit.
Since Claude Code and Claude on the web share the same account, they also share the same usage limit.
Anthropic Console account
The Claude Console is an account for using the API directly. It is pay-as-you-go, so you are charged based on how much you use.
I chose the first option, because a fixed monthly charge means I don't have to worry about unexpected costs.
After choosing a login method, a login page will open.
Note: Once you log in, your credentials are saved, so you don't need to log in again next time.
Security notes will appear. Read them and press Enter to continue.

Confirm the workspace.
Claude Code treats the current directory as your workspace, and it will be able to read, edit, and run files there. Make sure the path is the one you intended before continuing.

The Claude Code interface appears.

You can type your prompt at the ">" symbol. Let's try the /help command.
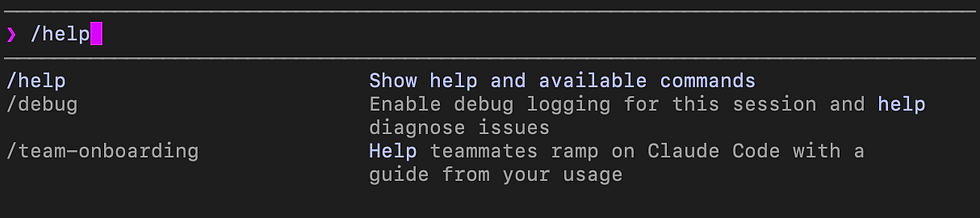

That's it – installation and setup are complete. It was simpler than I expected.
From here, I will start exploring what Claude Code can actually do.
Comments